Imaging Protocol
Hidradenitis suppurativa is photographed differently from psoriasis or atopic dermatitis. There is no full-body capture set: only the regions with lesions are photographed, because IHS4 counts lesions rather than measuring affected area, and because most of the regions involved are intimate. Photographs are always taken at the site by a physician or study nurse, as part of the clinical examination.
The example images on this page are synthetic dermatology imagery used for illustration; they are not patient records.
Image capture hardware compatibility
Smartphone-based capture
Legit.Health uses standard smartphone cameras for image acquisition. No specialised photography equipment is required.
Traditional clinical photography often relies on dedicated imaging systems, which require per-site hardware, per-site calibration, and significant rental or purchase costs. Smartphone-based capture eliminates these costs while maintaining the image quality needed for AI scoring.
The Legit.Health mobile application guides the site staff region by region, with real-time DIQA quality checks and immediate feedback on image adequacy.
Camera-based capture
Smartphones are the default input, but they are not the only one. The same AI also scores images from professional, camera-based photography systems, which capture higher-resolution, more consistent images than a smartphone. Hidradenitis suppurativa studies often ask for that higher image quality, because lesions sit in skin folds and small tunnel openings are easy to miss. Sponsors that already run standardised imaging at their sites can keep that setup and still obtain automated Legit.Health endpoints.
For studies that require standardised photography hardware, Legit.Health partners with QuantifiCare, a specialist in standardised 2D and 3D clinical imaging for dermatology trials.
Standard capture regions
The standard protocol defines nine regions, the anatomical sites where hidradenitis suppurativa appears. At each visit, the site staff examine all of them and photograph only those with lesions. No patient has lesions in every region at once, so a typical visit needs a handful of photographs rather than the full set of 13.
The nine regions
Example: one patient, one visit
Show all regions as a table
| Region | Photos | How to capture | What to include |
|---|---|---|---|
| 1. Face | 1 | Frontal view | Jawline and the area around the ears if involved |
| 2. Neck | 1 | Frontal view, plus lateral views if there are lesions on the sides | The full neck, front and sides |
| 3. Axillae | 2 | One photograph per side | Axillary vault, posterior axillary fold, and the lateral chest if lesions extend |
| 4. Inframammary area | 2 | Left and right sides separately | Submammary fold and any extension onto the lateral chest |
| 5. Abdomen | 1 | Frontal view | Periumbilical region and lower abdominal folds |
| 6. Genital area | 1 | Framed tightly around the lesions | Pubic region, vulvar or scrotal area and perineum, avoiding exposure beyond the lesions |
| 7. Inguino-crural folds | 2 | One photograph per side | Groin fold and upper inner thigh |
| 8. Back | 1 | Patient standing | The entire back, centred on the interscapular or lumbar area if lesions are there |
| 9. Buttocks | 2 | One photograph per side, patient standing or lying face down | Gluteal fold and any perianal extension |
There is no fixed posture for any region. The patient is positioned so that the whole lesion is visible and in focus, for example with the arm raised for an axilla, and the same position is used at every visit so that changes between visits reflect the disease rather than the photograph.
How to photograph each region
Distance and angle
Framing
Distance
Framing
Angle
No zoom
Lighting
Background
The most common error in the axilla is a lowered arm: the fold closes over the lesion and hides part of it. Raising the arm opens the fold, so the whole lesion is visible and the AI can detect every lesion in it.
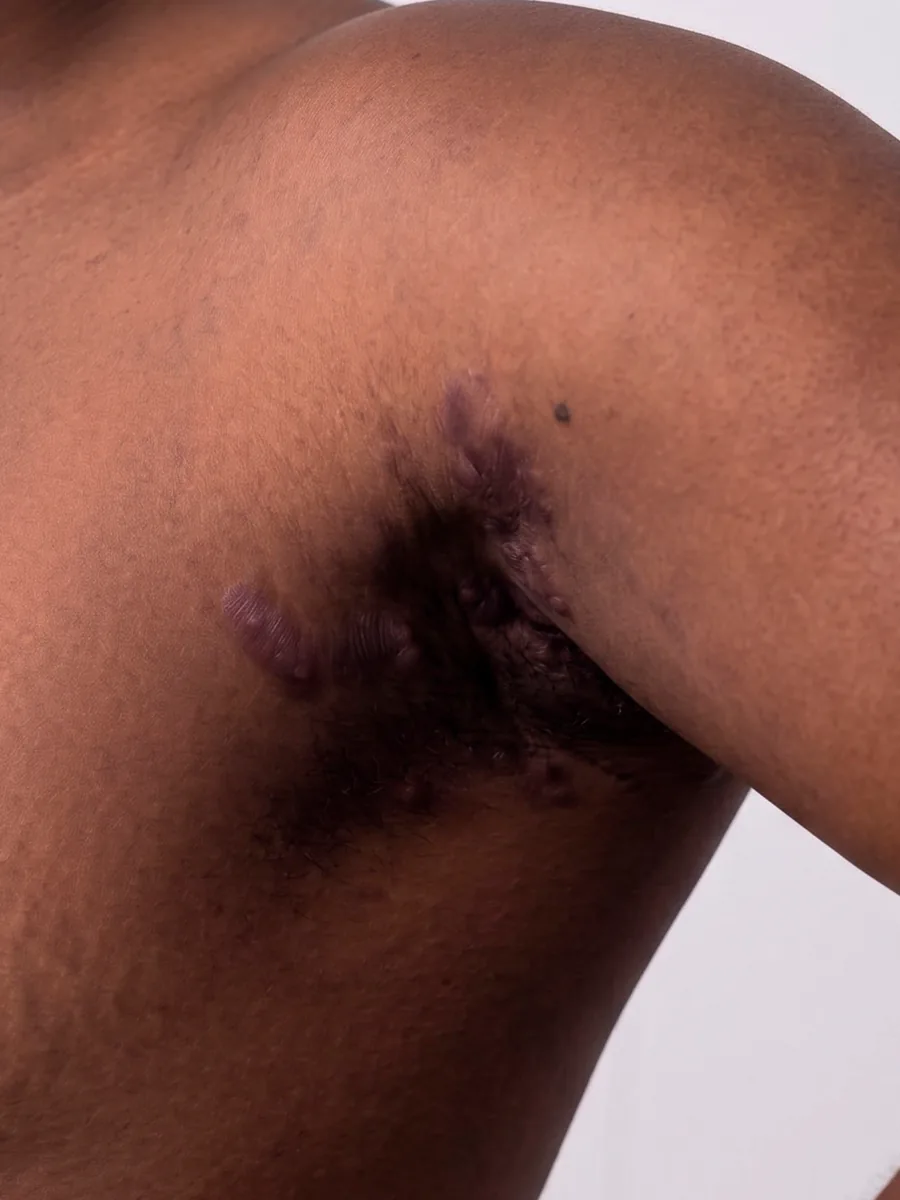
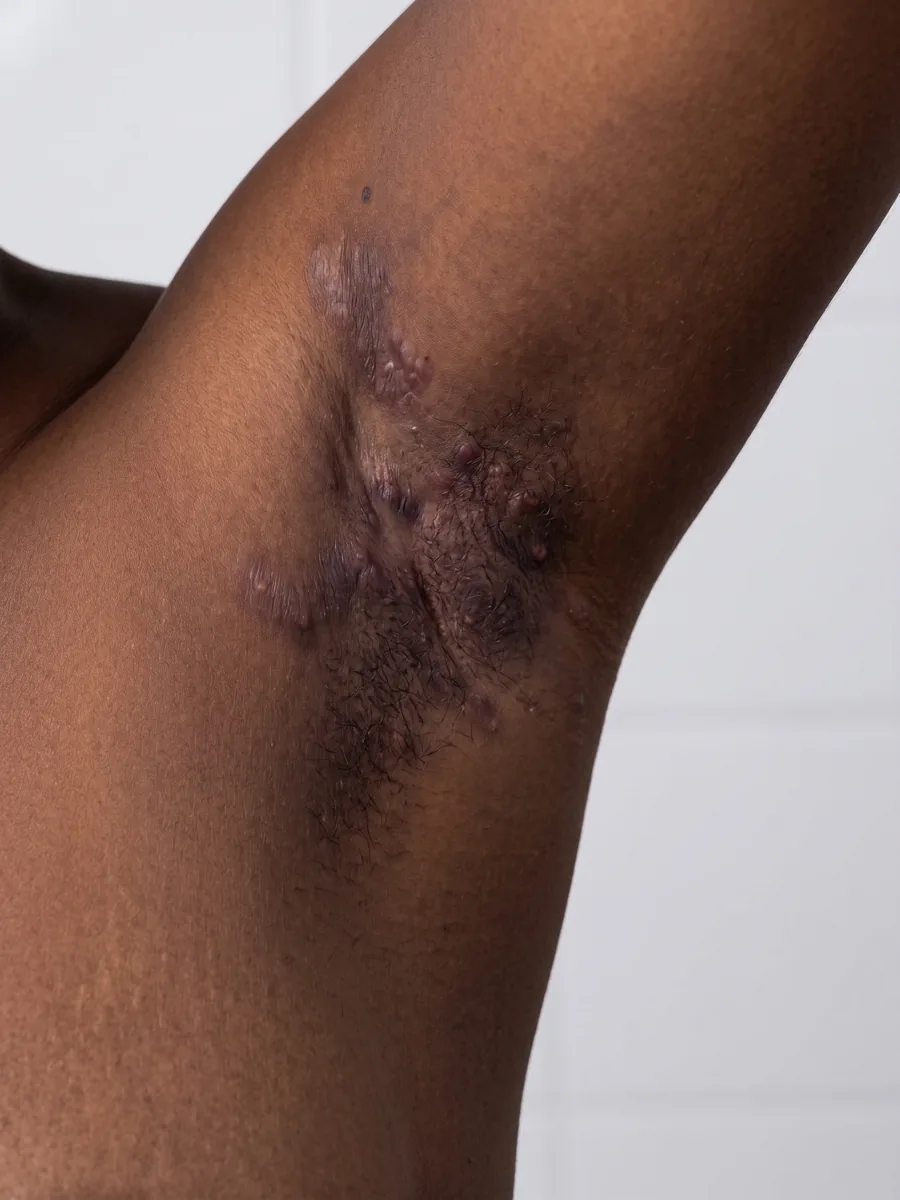
For every affected region, the sequence is the same:
- Overview: The whole affected region in one photograph.
- Closer view: When the region has several lesions close together.
- Skin folds: An extra photograph for any lesion hidden in a fold.
Each photograph is analysed on its own, so a lesion should appear whole in at least one photograph. See Limitations.
DIQA: Dermatology Image Quality Assessment
What is DIQA?
DIQA (Dermatology Image Quality Assessment) is an AI-powered image quality assessment algorithm that evaluates every captured image in real time before it is accepted for analysis. It was developed by Legit.Health and published in the Journal of the American Academy of Dermatology (Hernández Montilla et al., 2023).
What DIQA evaluates
| Quality dimension | What it checks | Why it matters |
|---|---|---|
| Focus | Sharpness of the image; absence of motion blur | Out-of-focus images can obscure small lesions, leading to undercounting |
| Lighting | Adequate, even illumination; absence of harsh shadows or glare | Poor lighting creates shadows that mimic or hide lesions |
| Framing | Correct anatomical region captured at the required angle | Incorrect framing means the AI analyses the wrong area |
| Resolution | Sufficient pixel density for lesion detection | Low resolution makes small features undetectable |
How it works in the workflow
- The site staff capture an image through the mobile application
- DIQA evaluates the image immediately (sub-second processing)
- If the image passes: it is accepted and queued for AI scoring
- If the image fails: the person capturing the image receives immediate feedback explaining the quality issue and must recapture
Patient preparation
- Clean and dry the affected area
- Remove dressings, clothing and jewellery from the area being photographed
- Expose only the region being photographed, one region at a time
Final quality check
Before submitting, the person capturing checks every photograph:
- In focus across the whole lesion
- Even, adequate lighting
- Nothing in the way: fingers, hair, clothing or dressings
- No patient identifiers, such as the face or tattoos, beyond what the region requires
Anonymisation
All photographs are anonymised automatically before they are stored or exported. Most hidradenitis suppurativa regions do not show the face, so the main identifiers are tattoos and other distinctive marks, which are masked together with the face when it is in the frame.