Imaging Protocol
This page describes how images are captured for vitiligo clinical trials using Legit.Health, and how a standardised set of body and face photographs produces the VASI score. It also covers image quality control, patient preparation, and site standardisation.
The example images on this page are synthetic dermatology imagery and vector illustrations; they are not patient records.
Image capture hardware compatibility
Smartphone-based capture
Legit.Health uses standard smartphone cameras for image acquisition. No specialised photography equipment is required.
Traditional clinical photography often relies on dedicated imaging systems, which require per-site hardware, per-site calibration, and significant rental or purchase costs. Smartphone-based capture eliminates these costs while maintaining the image quality needed for AI scoring.
The Legit.Health mobile application guides investigators through the capture process with visual perspective silhouettes, real-time DIQA quality checks, and immediate feedback on image adequacy.
Camera-based capture
Smartphones are the default input, but they are not the only one. The same AI also scores images from professional, camera-based photography systems, which capture higher-resolution, more consistent images than a smartphone. Sponsors that already run standardised imaging at their sites can keep that setup and still obtain automated Legit.Health endpoints.
For studies that require standardised photography hardware, Legit.Health partners with QuantifiCare, a specialist in standardised 2D and 3D clinical imaging for dermatology trials.
Standard capture protocol
The capture set follows the structure of the VASI itself. The T-VASI adds up six body sites (head and neck, hands, upper extremities without the hands, trunk, lower extremities without the feet, and feet) and the F-VASI scores the face alone, so each view photographs one side of one site, and no two views are scored on the same skin. Each view stands for a fixed share of the body surface, and that share turns the depigmentation measured in the photograph into VASI points.
The capture set is fixed: every visit needs all of its views, wherever the lesions are, and a view with no depigmentation is still photographed and contributes zero. The full set has 14 views; a study whose VASI endpoints are facial only needs just the two face views.
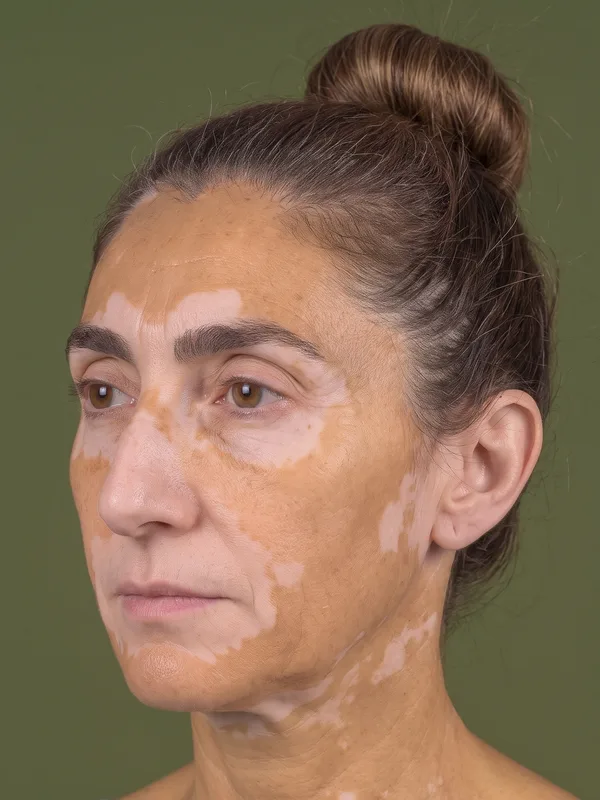
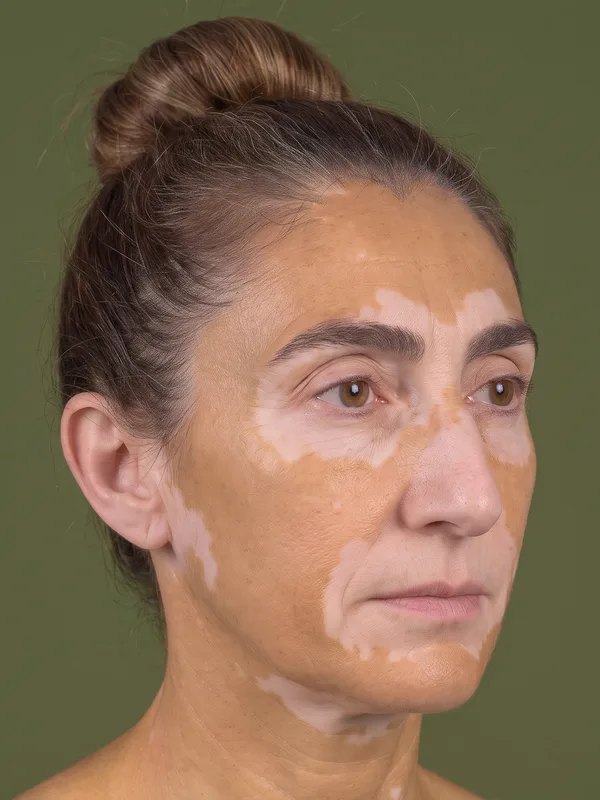
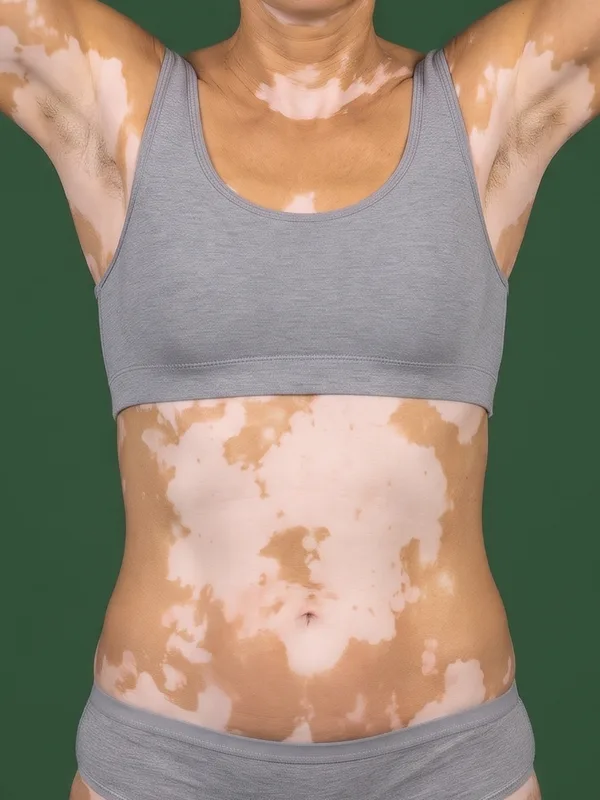
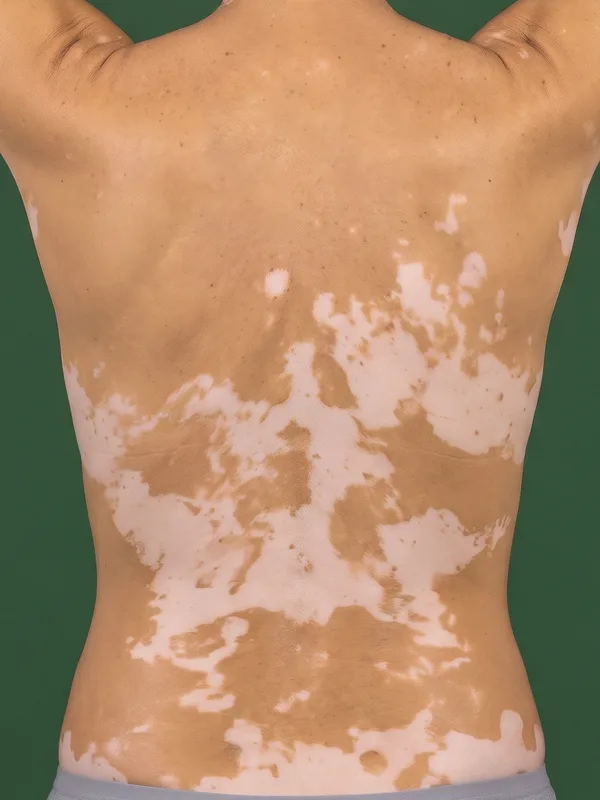
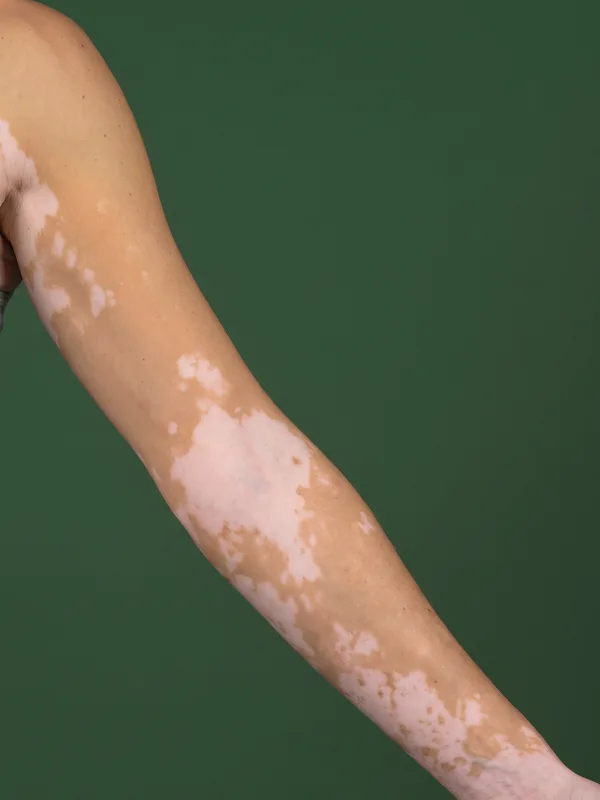
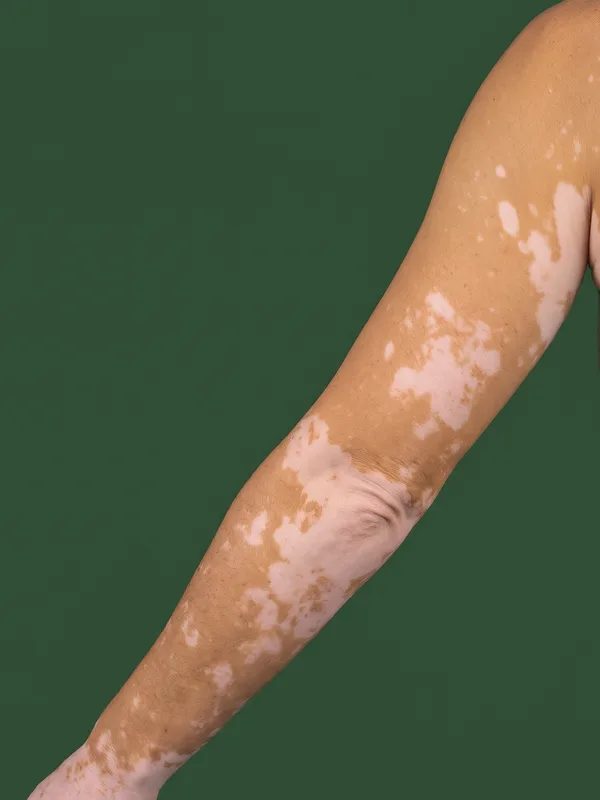
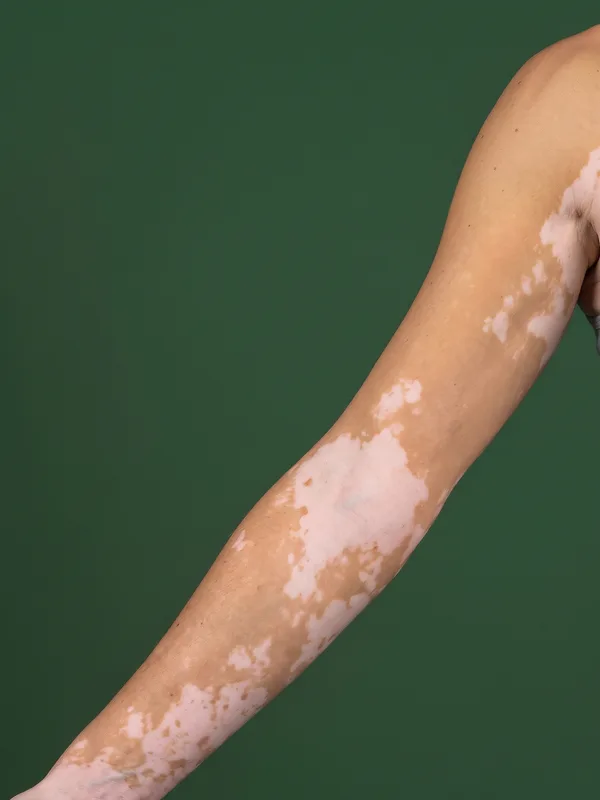
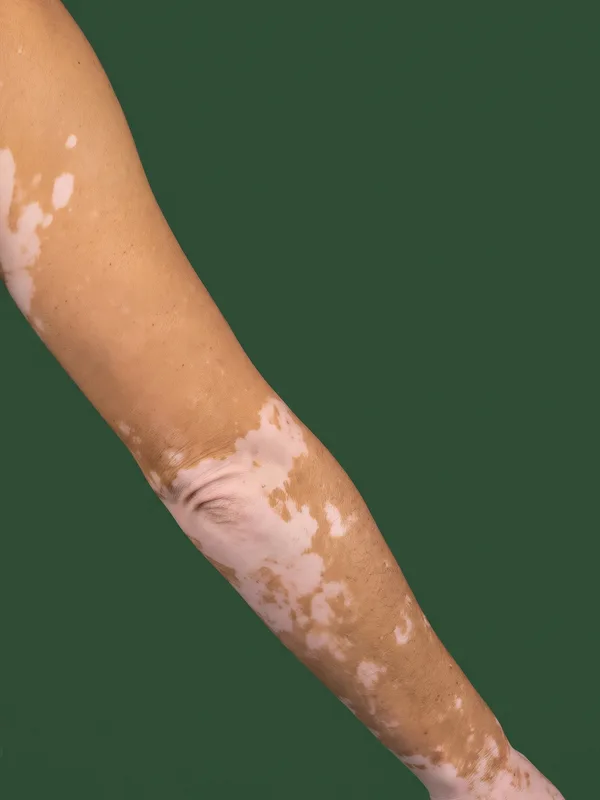
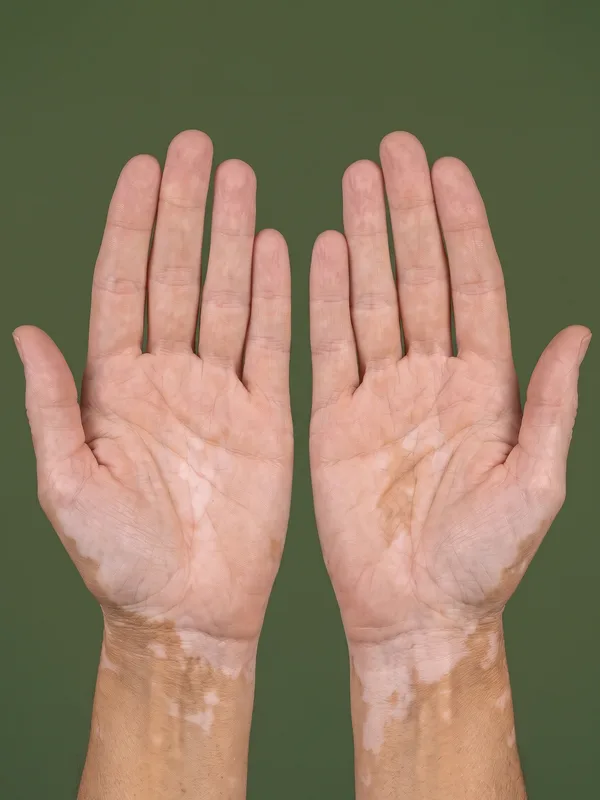
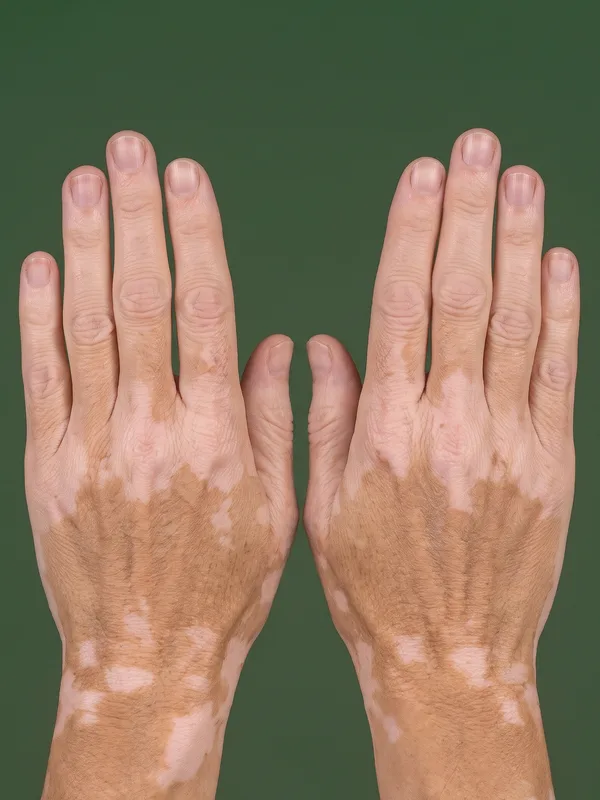
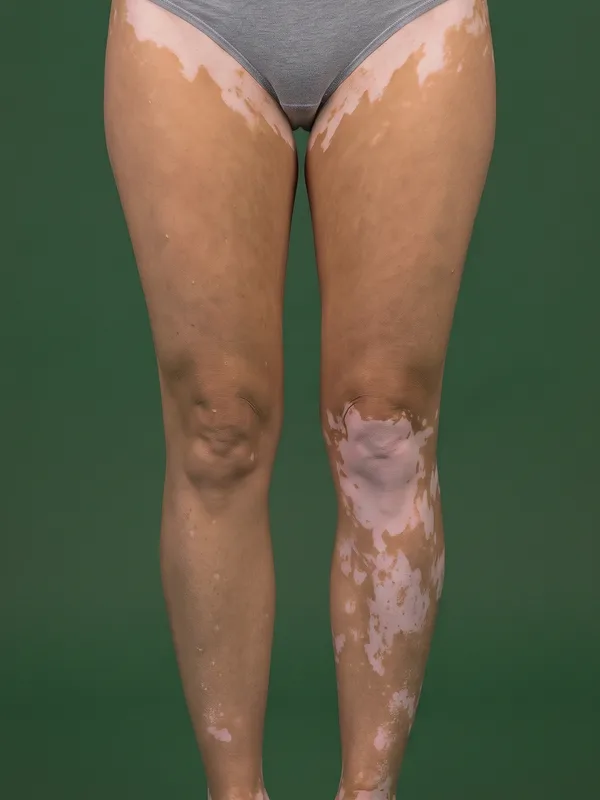
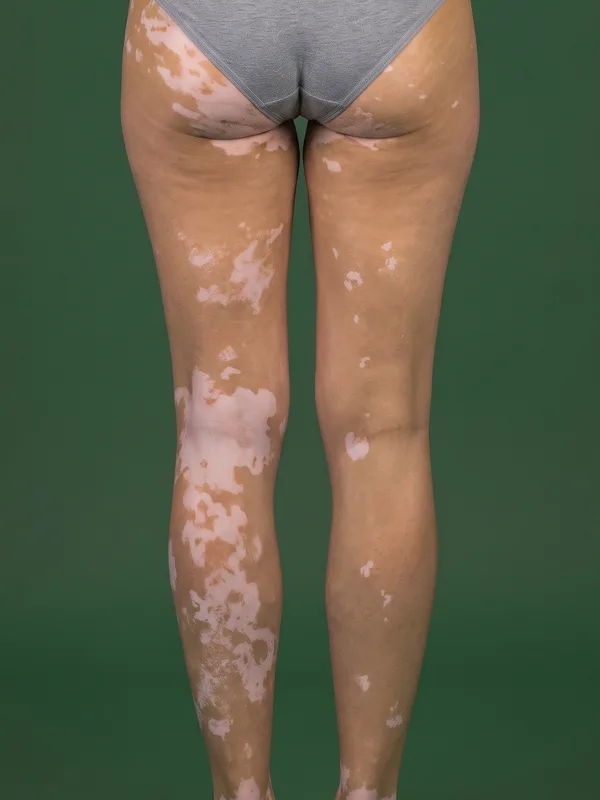
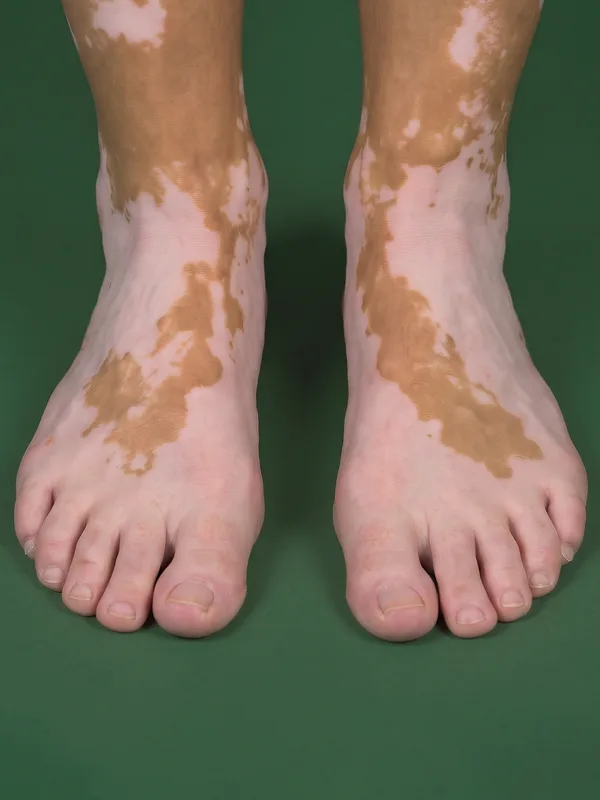
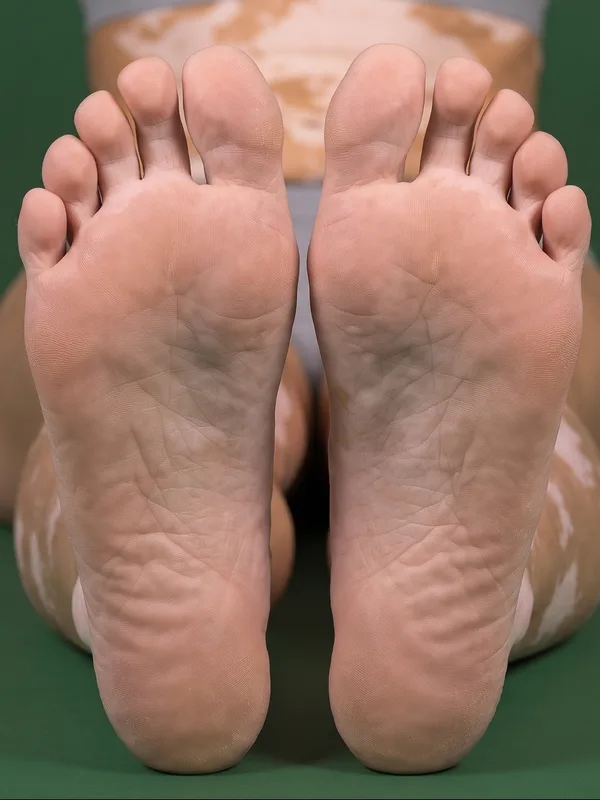
In each guide, the faded parts belong to other views; below it, the same view in an example photograph. The examples are synthetic images, not patient records.
The 14 views, their share of the body surface, and the parts photographed outside their site
| # | View | VASI site | Frame | Share |
|---|---|---|---|---|
| 1 | Face, left side | Head and neck | Midline to tragus, head turned about 45° | 1.75% |
| 2 | Face, right side | Head and neck | Midline to tragus, head turned about 45° | 1.75% |
| 3 | Trunk and neck, front | Trunk | Chin to waistline, hands behind the head | 14% |
| 4 | Trunk and neck, back | Trunk | Nape to waistline, same position | 14% |
| 5 | Left arm, front | Upper extremities | Shoulder to wrist crease, palm forward | 3.5% |
| 6 | Left arm, back | Upper extremities | Shoulder to wrist crease, from behind | 3.5% |
| 7 | Right arm, front | Upper extremities | Shoulder to wrist crease, palm forward | 3.5% |
| 8 | Right arm, back | Upper extremities | Shoulder to wrist crease, from behind | 3.5% |
| 9 | Hands, palms | Hands | Wrist crease to fingertips, fingers together | 2.5% |
| 10 | Hands, backs | Hands | Wrist crease to fingertips, fingers together | 2.5% |
| 11 | Legs, front | Lower extremities | Waistline to ankles, groin included | 16.5% |
| 12 | Legs, back | Lower extremities | Waistline to ankles, buttocks included | 21.5% |
| 13 | Feet, tops | Feet | Ankles to toes, from above | 3.5% |
| 14 | Feet, soles | Feet | Both soles, seated or lying face down | 3.5% |
| Full set | 95.5% |
The shares are the adult values of the Lund and Browder chart (Lund and Browder, 1944), which gives the body surface of every part separately for its front and its back. They take the place of the hand units that a rater counts at the visit, where the patient's palmar surface stands for about 1% of the body.
Three parts of the body photographed outside their VASI site
- The neck belongs to the head and neck, but it is photographed with the trunk, because no framing separates it cleanly from the chin or the chest. Its two 1% shares are included in views 3 and 4.
- The axillae belong to the upper extremities, but the trunk views, with the hands clasped behind the head, are the only position that shows them whole, so each axilla is photographed once, with the trunk.
- The genitals are never photographed (1%), although the VASI counts them, usually within the trunk.
The neck and the axillae are measured once and counted in the T-VASI; only the split between the sites differs from the VASI's. The back of the head and the scalp, which hair covers (3.5%), are not photographed either, so the full set covers 95.5% of the body surface. The buttocks and the groin are photographed in the leg views, as the VASI assigns them to the lower extremities.
From the views to the VASI
For each view , the depigmentation is the share of depigmented pixels within the skin that the photograph shows, and the view contributes its share of the body surface multiplied by that depigmentation:
A patient with 20% of the left half of the face depigmented and 10% of the right half has an F-VASI of . The regional values of the T-VASI are the sums over the views of each site.
Each view is weighted by its own share of the body surface. Averaging the percentages of several views would give a small view, such as the palms, as much weight as the back; adding up their pixels would give the most weight to whichever photograph was taken closest. Because is a proportion within one photograph, the distance to the camera does not change it, and the protocol needs no calibration marker or ruler.
How relates to the extent and the degree of depigmentation of the clinical VASI is set out in the scoring methodology.
The face
The F-VASI is scored on two views of the face, one for each half, with the head turned about 45 degrees from the camera. Each half of the face, from the midline to the tragus, faces a camera at that angle most evenly. A frontal photograph sees the outer cheek and the area in front of the ear almost edge-on, so a lesion there covers few pixels and counts for less than its surface; a profile does the same to the nose and the centre of the face.
In each view, facial landmarks separate the two halves of the face, and only the half that faces the camera is measured, within the facial area of the F-VASI: from the forehead to the original hairline, down to the jawline and back to the tragus, with the nose included and the lips, the ears and the neck left out. Trial protocols differ on the eyelids, so they follow the definition in the study protocol.
For both views, the patient keeps a neutral expression with the mouth closed and the eyes open, the hair is held back so that the forehead shows up to the hairline, and glasses are removed. The head stays level while it turns.
Capture technique
Each view is captured with the following distance, angle and patient position:
- Distance: The shortest distance at which the whole view fits in the frame, the same at every visit. The distance does not change , but a view that fills the frame shows smaller lesions and the specks of perifollicular repigmentation.
- Angle: Camera perpendicular to the centre of the site and at its height; for the face, the head turned about 45 degrees to each side.
- Patient position: Standing for the trunk, arm and leg views; seated for the face and the hands; seated with the legs extended, or lying face down, for the soles.
The palms view also shows the size of the patient's hand, which is the unit a rater uses to score the VASI at the visit, so the same image can serve a central reader who scores the photographs by hand.
Framing each view
is a proportion of all the skin in the photograph, so skin from a neighbouring site inside the frame changes the result. A forearm in the hands view, or an arm hanging beside the trunk, dilutes the depigmentation of the view and moves the other site's lesions into it.
- Frame each view to its own site, using the limits in the table.
- Where a neighbouring site cannot be kept out of the frame, cover it with a dark, matt cloth, which the AI does not count as skin.
- Photograph each view whole, in a single image. Do not split a view across two photographs, and do not photograph the same skin in two scored views.
- Underwear stays on for the leg views, and the genitals are never photographed.
DIQA: Dermatology Image Quality Assessment
What is DIQA?
DIQA (Dermatology Image Quality Assessment) is an AI-powered image quality assessment algorithm that evaluates every captured image in real time before it is accepted for analysis. It was developed by Legit.Health and published in the Journal of the American Academy of Dermatology (Hernández Montilla et al., 2023).
What DIQA evaluates
| Quality dimension | What it checks | Why it matters |
|---|---|---|
| Focus | Sharpness of the image; absence of motion blur | Out-of-focus images can obscure small lesions, leading to undercounting |
| Lighting | Adequate, even illumination; absence of harsh shadows or glare | Poor lighting creates shadows that mimic or hide lesions |
| Framing | Correct anatomical region captured at the required angle | Incorrect framing means the AI analyses the wrong area |
| Resolution | Sufficient pixel density for lesion detection | Low resolution makes small features undetectable |
How it works in the workflow
- The investigator or patient captures an image through the mobile application
- DIQA evaluates the image immediately (sub-second processing)
- If the image passes: it is accepted and queued for AI scoring
- If the image fails: the person capturing the image receives immediate feedback explaining the quality issue and must recapture
Patient preparation
- Undress the regions to be photographed down to underwear, so that the whole region is visible
- Remove make-up and self-tanning products, which mask depigmented skin on the face and body
- Remove jewellery, watches and glasses, which cover skin or cast shadows
- Avoid applying creams or topical treatment on the day of the visit before the photographs, as a glossy surface reflects light and can look like depigmentation
- Keep hair tied back so that the forehead, the temples and the neck are visible
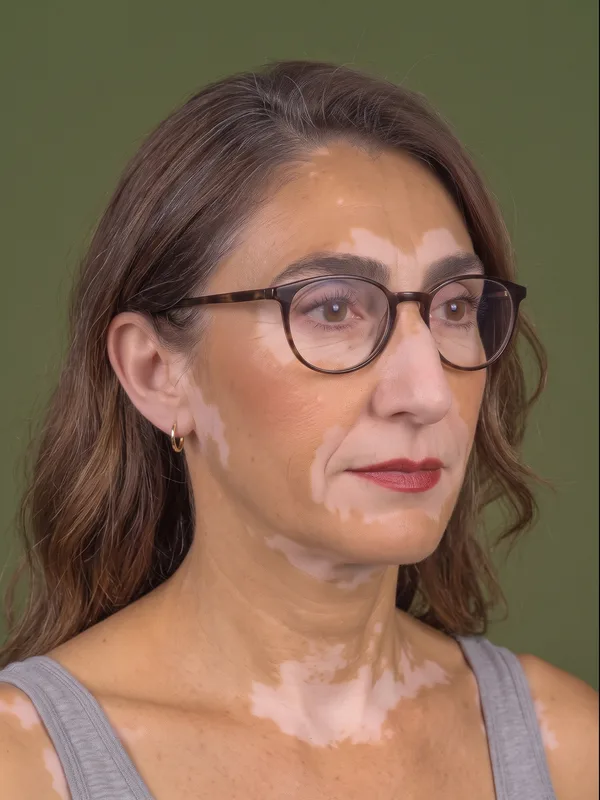
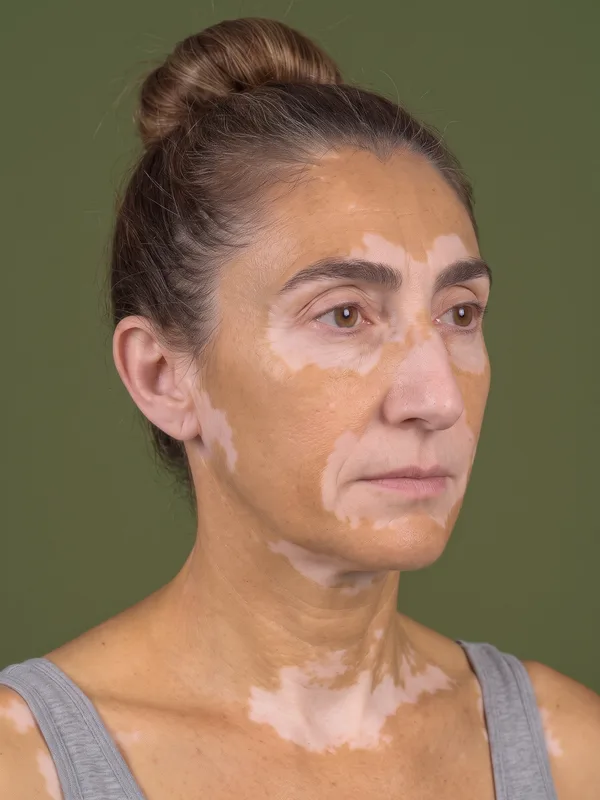
Environmental conditions
- Background: Neutral, non-reflective background, which reduces artefacts and helps separate the body from its surroundings
- Lighting: Well-lit environment with even illumination. Avoid harsh directional lighting and flash glare, which create bright spots that can look like depigmentation, and deep shadows that hide it.
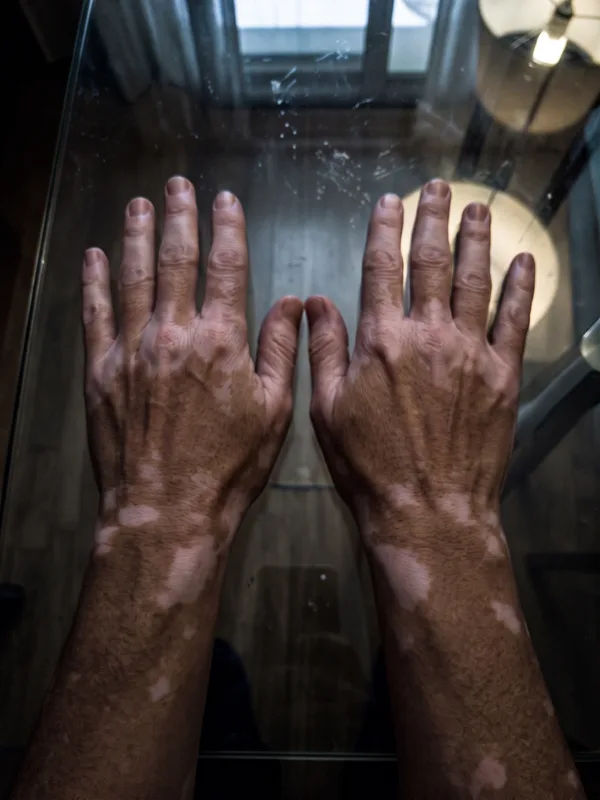
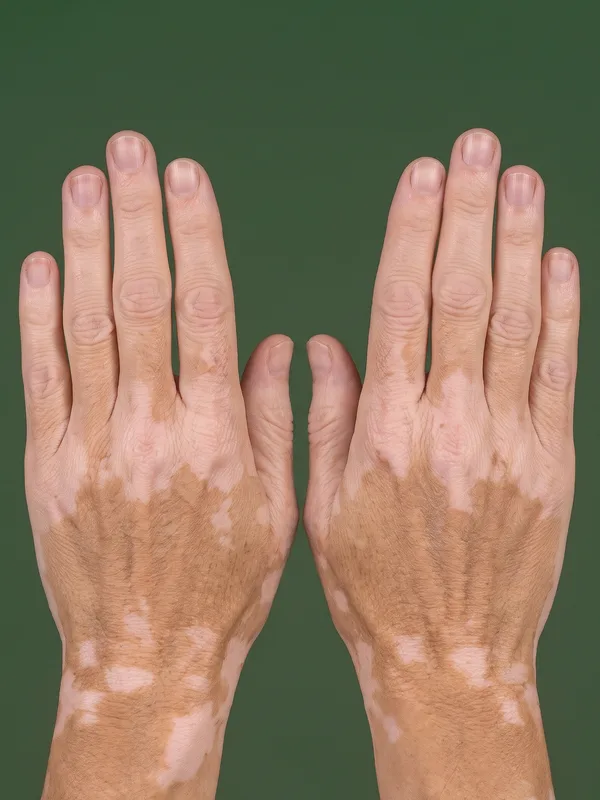
The most important principle is consistency: the same lighting conditions, the same distance, the same angles, and the same patient preparation at every visit. Consistent capture conditions ensure that score changes between visits reflect actual clinical changes, repigmentation or further spread, not variations in image acquisition.
Anonymisation
The AI scores the original photographs. The photographs that the sponsor receives are anonymised: the face views include the patient's facial features, so the facial features are pixelated or covered with black bands, and cannot be used to re-identify the patient. Because masking happens after scoring, lesions around the eyes and the mouth, which are common in facial vitiligo, are measured in full even though the sponsor's copy hides them.
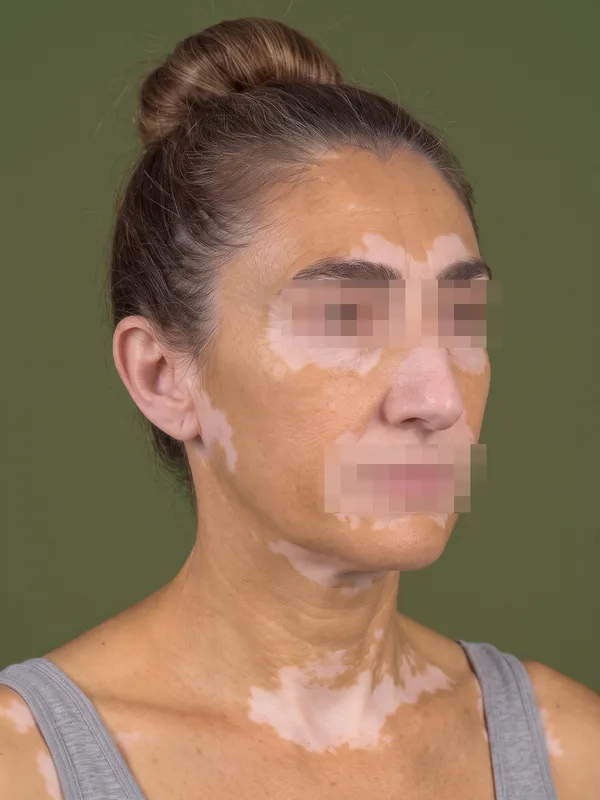
Features pixelated
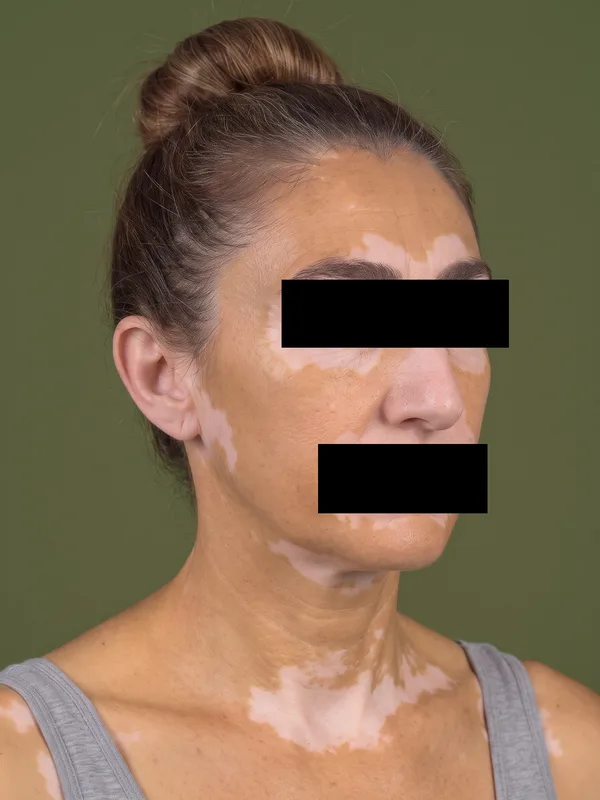
Features covered with black bands